Jellyfin is the volunteer-built media solution that puts you in control of your media. Stream to any device from your own server, with no strings attached. Your media, your server, your way.
This software directly competes 1:1 (one-to-one) with Plex and Emby. Both of which are closed sourced and pay-walled to a degree.
This comprehensive how-to will cover understanding basic hardware concepts, to installing and running Jellyfin in a Docker container on a traditional computer using a Linux based OS.
¶ Get Started
By default, your media is only available to you while at home on your own internal network. If you want to access it externally outside of your home network, setup will include several additional steps. This directly relates to how comfortable you are with computer use and your knowledge. This guide will attempt to help as much as possible.
- Internal: You may use Windows, macOS or Linux. It comes down solely down to preference here as local networking is straight forward with zero risks. Generally, macOS is not recommended for several reasons. Notably due to hardware design for which macOS runs on limiting expandability.
- Internal and External: You need server software to facilitate this. Do not use Windows Home, Pro or Enterprise as a server! It is not designed for it and is a security problem. It can lead to more trouble than it is worth and already has unique quirks at the start you must work around. Windows Server was designed for the task, but unlike Linux, it is not free. Again, macOS is not recommended.
For first time users with little-to-no experience, it's easier to install a Linux Desktop version rather than a Server version. Desktop contains a preconfigured user interface (GUI) that makes setup easier. Note that the presence of a GUI adds a small amount overhead.
I personally use Arch since it's a rolling release OS and nearly everything I run is in a container. The most common and recommended distros for starters is Ubuntu or Linux Mint. Both of which are point release. (What's the difference?). There are several others to pick from. If you're unsure which one to pick, start here: https://distrochooser.de/
Please use a strong account password during setup.
¶ Hardware
Repurpose unused, older hardware! A lot of people already have existing older systems they can put to use. A great way to reduce e-waste and save money.
- Laptops have several hard limitations and should generally be avoided (thermal, expandability). However, you can still use them if you do not mind these limitations.
- RaspberryPi boards can do the job, but that doesn't mean it can do it well in all scenarios. These are low powered devices with a lot of limitations. You should really consider using something else.
- Tower DIY PC makes future hardware changes easier to expand and adapt. You tailor the build to your needs. If you are comfortable with this, this is the best approach.
- Tower Prebuilt PCs are excellent choices for those that do not feel comfortable building one themselves. Most can be expanded on later.
- SFF Prebuilt PCs (small form factor) is not recommended but can be used. These are typically used as workstations for offices. They have very limited space to expand.
- NAS (network attatched storage) is an alternative if you don't want to manage an OS. Though these devices fall out of the scope of this documentation.
Whatever your choice, all can be had for affordable prices. Below are some general guidelines that may help you narrow down your choice.
¶ GPU
Your top priority should be ensuring you have a GPU to use. They come in two forms.
IGPU (Recommended) is an integrated graphics chip on the same die as the CPU. It is power efficient and can easily handle a handful of users streaming at once. Allows for really compact computers. Intel or AMD are your choices here.
DGPU is dedicated graphics. It is a separate piece of hardware. Most off the shelf models are overkill for almost every scenario. It consumes more power and uses additional space. There is no need to purchase one unless you intend on having more than a handful of active users streaming at once. If you have a spare one, you can put it to use if you desire. Intel, AMD or Nvidia are your choices here.
¶ CPU
You should have at least two cores at the minimum. Realistically, it is unlikely you'll ever need more than four cores with a GPU.
An cheap Intel Pentium G7400 includes an IGPU and can do the job fine if you want to keep the budget as low as possible. Should the workload increase, such as more users connected, more installed software/services, or you want more performance in general, an AMD Ryzen 3 or Intel Core i3 CPU is recommended. Think about what you intend to use this computer for. If just for Jellyfin, anything above this performance bracket will mostly go under used. If more than Jellyfin, you can opt for Ryzen 5/7 or Core i5/i7.
However, note that without a GPU, you will need more cores to provide the best performance. In this case, a Core i7 or Ryzen 7 is a good starting point. You don't need commerical server grade CPUs (Threadripper or Xeon) for a home based server. It is entirely overkill and not cost effective.
¶ Important Notes
This information pertains to both of the above sections and will help you get the correct information for a CPU & IGPU combination.
- Nvidia hardware acceleration (NVENC/DEC) is driver capped at five simultaneous transcodes ("Max # of concurrent sessions") for "Consumer" hardware making it sub optimal for high user count streaming. You have to opt for "Professional" hardware. Alternatively, you can use third-party software to patch the driver removing the limitation. Due to their low price, the often recommended Nvidia P400 and T400 are not a great choice out of the box. These cards are driver capped at three simultaneous transcodes unless driver is patched.
- AMD hardware acceleration (AMF) is known to be difficult to setup and keep working reliably. The driver is built against the current OS kernel version installed. When the OS kernel updates, there is chance the driver will fail to load. This requires manual intervention and may be difficult for new users to correct. You can use VAAPI on AMD, while faster than CPU, it is slower then QSV or NVENC/DEC.
- Intel hardware acceleration (QSV) is almost as easy to setup as VAAPI. This is because the driver is built upon VAAPI and extends it. It is the recommended method. Very fast and good quality.
Videos come in an array of containers and formats. Not all devices will play the same file directly. While you certainly can convert something before adding it to your library, letting Jellyfin do it on the fly is convenient. A GPU shines the most when you transcode to lower quality when streaming over mobile networks as it is significantly faster than a CPU transcode.
If you want optimal support of H264 (AVC), H265 (HEVC), SDR (8 bit) and HDR (10 bit) formats:
- 2018 and later AMD Ryzen processors with an IGPU. They contain VCN 1.0. Starting with a Ryzen 3 2200G.
- 2017 and later Intel processors with an IGPU. They contain QSV v6. Starting with a Celeron G4900T.
- AMD RX 50xx or later dedicated GPUs.
- Nvidia RTX 20xx or later dedicated GPUs.
- Intel ARC dedicated GPUs such as the A310 and A380.
For baseline support of H264, the oldest possible hardware you can use is:
- AMD "Piledriver" from 2012.
- Intel "Sandy Bridge" from 2009.
- Nvidia GTX 7xx from 2014.
- AMD Radeon HD 4000 from 2008.
CPUs and GPUs newer than 2009 leading up to 2017 may contain any combo of H264 (AVC), H265 (HEVC), SDR (8 bit) and HDR (10 bit) support in some form. You should check the specification sheet to confirm.
Depending on how many users you expect to be watching at the same time will also affect your choice of hardware.
- Just you = CPU is fine.
- 2 people = CPU may struggle keeping up. Consider a GPU.
- 3 - 5 people = Intel, AMD or Nvidia GPU.
- 6+ people = Intel or AMD GPU. Nvidia GPU driver must be patched for consumer.
¶ Intel
Nearly all of Intel's CPUs have integrated graphics. Spanning Core, Celeron and Pentium.
If you're looking to use an Intel Core CPU, the models suffixed with an "F" do not contain an IGPU.
¶ AMD
About half of AMDs CPUs have integrated graphics.
If you're looking to use an AMD X CPU, only the 7000X series CPUs have an IGPU. 1000X, 2000X, 3000X and 5000X do not have IGPUs. You must use a CPU suffixed with H, HX, G, or GE.
¶ Storage
You should use an SSD for the operating system . For the media itself, you want large hard drives. A good starting point is two 4TB drives. One for Films and one for Shows. Because your system will presumably be on close to 24/7, you should opt for hard drives that are designed for it. Mainstream or general purpose is not ideal and prone to failure. I recommend Western Digital's Red lineup.
A base Red is perfectly suitable for most users. If you have a dozen or more users with daily use or intend to use a RAID array, a Red Plus or Pro is significantly better.
Keep in mind the future. If you are limited on SATA ports, you may need to opt for larger drives to start. Prebuilt desktops typically have no additional, or few SATA ports.
¶ RAM
CPUs with an IGPU will reserve RAM to function as VRAM for graphics chip. With an installtion of Linux, Jellyfin and optionally NGINX, the absolute minimum amount of RAM you need is 4GB, with about 1GB of that reserved for the IGPU if needed. A single 8GB stick of DDR4 or DDR5 RAM can be had for cheap ($20-$40 USD) and is recommended to reduce out of RAM issues. You do not need to opt for high performance RAM as it does not matter. Consider your needs and future use. You may need to purchase 16GB or more.
¶ Network
You want this computer connected to the router via ethernet cable. You don't need to purchase a WiFi card unless it is a must. If the computer already comes with WiFi, you should avoid using it if you can. Streaming video can be bandwidth intensive. Using WiFi your server computer will send the video stream to the router and the router sends the stream to your device. This is 2x the bandwidth for a single video. This may create congestion and/or bog down your home WiFi should your router not be up to the task. Using an ethernet cables eliminates this airtime congestion by only sending through the air once.
¶ Hardware summary
TL;DR
- CPU: 2017 or later for optimal support. At least two cores if budgeting, but four cores or more is better. Prefer Intel for easy hardware acceleration setup.
- GPU: Integrated into the CPU if you intend to serve six or less concurrent users. Otherwise, reuse a a DGPU you own or grab an Intel ARC A380.
- RAM: At least 4GB if you want to keep it cheap. Prefer 8GB or more if you can. High performance XMP does not matter.
- Storage: A small SSD for the OS and large NAS HDDs focused on 24/7 use.
- Network: Prefer Ethernet over WiFi.
¶ Basic Setup
After your chosen Linux OS is installed, press CTRL + ALT + T to bring up a Terminal window. Unless otherwise noted, you'll need root privileges to install and configure most software:
sudo su
Start by updating all existing software:
# Ubuntu or Mint
apt update; apt upgrade
# Arch
pacman -Syu
After this step you'll want to reboot. In most cases, after a fresh install this is needed.
shutdown -r now
From here on, all of the software you install (or build) will be done through Terminal. Again, root is needed.
For security and functionality reasons, create a dedicated user that the Jellyfin service container will use:
useradd jellyfin -u 950 --system --shell /usr/bin/nologin
Find the GID for the render group with:
cat /etc/group
Remember that number. You'll need it later.
Append jellyfin to the render group:
usermod -aG render jellyfin
¶ Local Networking
You need to make sure your computers LAN IP never changes. This is to keep the experience consistent. Without this, your router may assign a different IP at random times across reboots.
- Login to your router. This is either
http://192.168.1.1or something likehttp://routerlogin.net. - Find DHCP reservations to assign your server computer a static IP for the local network. You'll do this with the MAC address. Instructions vary by router, so read the manual. As an example, you assign a MAC address
00:AA:BB:CC:DDto an LAN IP192.168.1.100. To find the MAC in Linux, open Terminal and type inip addr show
Remember this IP for later. You will need it.
¶ Install Docker
Install the Docker engine.
- Ubuntu or Mint users read here.
- Arch:
pacman -S docker
To make Docker easier to manage, you'll use Portainer.
This gives you a GUI to work with. You will have to use Terminal to get it installed:
docker run -d -p 8000:8000 -p 9000:9000 --name=portainer --restart=always -v /var/run/docker.sock:/var/run/docker.sock -v portainer_data:/data portainer/portainer-ce
You can access the UI at http://localhost:9000. If the container fails to run or build, you need to click on the container name and click [Logs] under "Container status".
To update Portainer:
docker stop portainer; docker rm portainer; docker pull portainer/portainer-ce:latest; docker run -d -p 8000:8000 -p 9000:9000 --name=portainer --restart=always -v /var/run/docker.sock:/var/run/docker.sock -v portainer_data:/data portainer/portainer-ce
¶ Media location
These instructions are basic for media location. You should set up media locations before you run Jellyfin. You can you can use one large storage pool (RAID) or opt to use a single large drive with a Films and TV folder.
- Open Disks from the launcher.
- Select the disk and the partition you want to use as the storage for media.
- Click the double cog icon and select [Edit mount options].
- Toggle off [User session defaults].
- Make sure [Mount at system startup] and [Show in user interface] is ticked.
- Change the mount point to
/media/Showsor/media/Filmsif you have two seperate drives. Or if one single drive or RAID,/media/Jellyfin - Click [OK]
You can also setup default permissions at this time.
apt install acl
cd /media
chown -R jellyfin:jellyfin TV
chmod -R 6775 TV
setfacl -d -m u::rwx TV
setfacl -d -m g::rwx TV
setfacl -d -m o::rx TV
¶ Deploy Jellyfin stack
Before the stack can be deployed you need to create some files a file manager will use.
mkdir -p /opt/jellyfin/filebrowser
touch /opt/jellyfin/filebrowser/database.db
touch /opt/jellyfin/filebrowser/.filebrowser.json
nano /opt/jellyfin/filebrowser/.filebrowser.json
Once nano opens, paste or write in the following content:
{
  "port": 80,
  "baseURL": "",
  "address": "",
  "log": "stdout",
  "database": "/database.db",
  "root": "/media"
}
Note that the root line is where your media is actually located. If you have a different location, make sure to change the path here. When you are done, CTRL + S to save and CTRL + X to close.
Make the folder and all files owned by the jellyfin user:
chown -R jellyfin:jellyfin /opt/jellyfin
In Portainer, create a stack. Paste in the following:
version: "3.5"

services:
  jellyfin:
    image: jellyfin/jellyfin
    container_name: jellyfin-server
    user: "950:950"
    network_mode: "host"
    extra_hosts:
      - "host.docker.internal:host-gateway"
    # Remember that group number you got earlier? Enter that on the line below. 989 is usually the default.
    group_add:
      - "989"
    devices:
      - /dev/dri/renderD128:/dev/dri/renderD128
    environment:
      - JELLYFIN_CACHE_DIR=/var/cache/jellyfin
      - JELLYFIN_CONFIG_DIR=/etc/jellyfin
      - JELLYFIN_DATA_DIR=/var/lib/jellyfin
      - JELLYFIN_LOG_DIR=/var/log/jellyfin
    volumes:
      - /opt/jellyfin/etc/jellyfin:/etc/jellyfin
      - /opt/jellyfin/var/cache/jellyfin:/var/cache/jellyfin
      - /opt/jellyfin/var/lib/jellyfin:/var/lib/jellyfin
      - /opt/jellyfin/var/log/jellyfin:/var/log/jellyfin
      - /media:/media
    restart: "unless-stopped"

  jellyfin-filebrowser:
    image: filebrowser/filebrowser
    container_name: jellyfin-filebrowser
    user: "950:950"
    volumes:
      - /media:/media
      - /opt/jellyfin/filebrowser/database.db:/database.db
      - /opt/jellyfin/filebrowser/.filebrowser.json:/.filebrowser.json
    ports:
      - 8098:80
    restart: "unless-stopped"
The environment and volumes sections setup Jellyfin in docker so it is portable. This means if you later want to run Jellyfin on bare metal, you can do so. Simply place the contents of /opt/jellyfin in the root of a Linux installation.
Once deployed you can access it at http://<yourIP>:8096. Go through the initial setup process by adding a user. Do not create a user named "admin" as this unnecessary.
Before you confirm media locations, setup metadata handling for each library! In the event you want to reset Jellyfin and remove the existing database, saving metadata to external NFO files will allow you to retain custom info on next import. You should set the default metadata handler and enable the option to save metadata to NFO.
Use the filebrowser app at http://<yourIP>:8098 to manage files. It will use the same Jellyfin user to retain permissions so you can add and delete content freely from other devices.
¶ Hardware Acceleration
Make sure jellyfin has access to render. The container includes all the required components for hardware acceleration.
¶ Setup Complete
With the above sections complete, Jellyfin is ready to be used locally. There is nothing further you need to do.
- If you want to remove the display from your server and manage it from your Windows computer, read the Headless Management section below.
- If you want to have remote streaming access, read the Remote Streaming section below.
¶ Headless Management
"Headless" in computer terms means without a display. Many servers are in fact headless and thus are managed entirely over command line or remote desktop from a main computer.
If you want to learn how to do this, read here.
¶ Remote Streaming
Remote streaming is optional and not required to use Jellyfin.
¶ ISP Limitations
- Network speed. Evaluate your upload.
- NAT type. ISPs may use CGNAT for certains areas or plans.
- Dynamic DNS. ISPs may assign you a public IP that rotates on a schedule or at random.
You may need to reach out to your ISP for points 2 and 3. You can safely stream if you are:
- Not behind a CGNAT.
- Uploading at a rate of at least 1 MiB to avoid incurring consistent buffering. If you are under this rate, you may struggle to serve yourself and others.
- Prepared and willing to mitigate DDNS.
Here are some things you can do:
Many routers will tell you the public (WAN) IP on the administration page. You should login to the router and locate network or system information to retrieve it. Check what IP websites see. If the IPv4 address does not match what the router shows, you are behind CGNAT.
The command tracert will show you the route taken to reach a websites server.
tracert google.com
If you see an IP between 100.64.0.0 to 100.127.255.255, this is RFC6598 for use as CGNAT and means your ISP is using it.
You could get around this with IPv6 but this comes with it's own set of problems. If you happen to be using internet somewhere that only has IPv4, you won't be able to reach your server. You need another proxy like Cloudflare, Fastly or Amazon CloudFront.
Simply rebooting your modem and router can be enough to trigger an IP change. If this doesn't, you may need to observe and keep track of your WAN IP over a period of time.
¶ Domain
A domain is used to securely access and stream outside of the home. You can purchase your own for a more personalised approach from any of these registrars:
¶ DNS Record
You'll need to setup your own DNS A (IPv4) and AAAA (IPv6) records. This can be done using the control panel from the service you purchased a domain from. Otherwise, the services below provide a subdomain and automate the Dynamic DNS part for you.
They provide all the necessary steps and tools. If you purchased a domain for yourself from a registrar, the task of Dynamic DNS update falls onto you. This can be done with scripting and APIs. Refer to your registrars help pages on how to set this up.
You can obtian your WAN IP with command line:
curl https://ipinfo.io/ip
Manually setting or updating a DNS record is simple. You use A (IPv4) and AAAA (IPv6) records to assign your WAN IP to a subdomain address.

¶ Port Forwarding
Find Port Forwarding in router settings. This is basically configuring your routers built-in firewall. Instructions vary by router, so read the manual. You need to open ports in the routers firewall to route all inbound HTTP/S web traffic to a specific destination. Forward only ports 80 and 443 to the static IP you set earlier. You do not need or want to forward Jellyfin's default ports. Only the two mentioned. All other non-essential ports are blocked by default.
¶ Firewall
If you do not have a firewall in front of your server, you need to use the system itself. Default firewalls such as iptables and nftables can feel overwhelming to use. Thankfully, UFW is a translation layer that is simpler to use.
Once you have installed UFW, setup default rules:
ufw default deny incoming
ufw default allow outgoing
Allow HTTP and HTTPS from anywhere:
ufw allow 80
ufw allow 443
Allow all inbound traffic on the local network only:
ufw allow from 192.168.1.0/24
Enable the rules:
ufw enable
These are general rules that serve as examples. You may need to alter the LAN IP Address space and add additional rules to suit your needs.
¶ NGINX
For serving Jellyfin content over the internet you need server software. Specifically a reverse proxy. This guide will use NGINX. Always use the official package from nginx.org if not building yourself. I share the custom build I use myself, but do not offer support.
Easiest method for all users.
Official instructions on how to obtain and install NGINX at: NGINX Linux packages (nginx.org)
Advanced users only. NGINX is built from the latest source code. It is generally not recommended unless you are OK with potential compatability issues. You understand you may need to debug, rebuild, update or rollback more than normal. From personal experience, there are typically no issues.
Read the "HTTP/3 + QUIC" tab.
The benefit here is going be greater for mobile connections. But overall there is an improvement when streaming. The initial connection that sets up the client <--> server communication, when correctly configured, has reduced loading times. Furthemore, there is an increase in security from multiple aspects.
¶ NGINX Configuration
NGINX uses configuration files to create servers (virtual hosts). You can get reference configuration files here. You will need to edit these to a degree to make them work for you. I have filled out a majority of the configuration.
¶ Certificate
Your connection should always be secure (HTTPS). To do this, you need a TLS certificate. Certbot will collect a security certificate for your domain using the service LetsEncrypt. It's ideal to install with snap rather than apt on Ubuntu. Arch can use pacman. You should also use a DNS plugin if you have your domain name server set with one of the listed providers on the linked DNS plugin page. This allows for easy certificate management.
# Ubuntu
snap install --classic certbot; snap set certbot trust-plugin-with-root=ok; snap install -certbot-dns-xxx; snap connect certbot:plugin certbot-dns-xxx; ln -s /snap/bin/certbot /usr/bin/certbot; certbot --version
# Arch
pacman -S certbot certbot-dns-xxx
Unless you are aware that you need to support very old HTTPS clients that are not supported by most sites, you can safely just transition your site to use ECDSA keys instead of RSA keys.
The main advantage of ECDSA stems from the same level of security for less cost in performance. RSA 2048 provides a security level of 112 bits. ECDSA 224 provides a security level of 112 bits. This is a significant difference in key size. Smaller key sizes require less bandwidth to set up a TLS stream. This means ECDSA certificates are ideal for mobile use. While this might not be noticable in day to day use, in terms of web based services, this performance advantage matters.
ECDSA (recommended)
certbot certonly --dns-xxx --dns-xxx-credentials --key-type ecdsa --elliptic-curve secp256r1 --uir --hsts --staple-ocsp -d yourdomain.me -d '*.yourdomain.me'
RSA (not recommended)
certbot certonly --dns-xxx --dns-xxx-credentials --key-type rsa --uir --hsts --staple-ocsp -d yourdomain.me -d '*.yourdomain.me'
Full disclosure: Some people believe ECDSA NIST curves contain a deliberate backdoor for the NSA. There is currently no proof of this. You are free to make your own decision. EdDSA is the most recent implementation of cryptography and aims to be an alternative of ECDSA, sans NIST. However, it is currently not supported in any capacity. CA's are bound by an agreement that allows them to be trusted in a browser or on a device. 6.1.5 "Key sizes" defines the only accepted methods.
In addition to certificate type, the version of the TLS protocol used will affect security.
- TLS 1.3 is Modern compatability and provides the highest security when using modern devices and browsers. The reference configuration files are setup for this.
- TLS 1.2 & 1.3 is Intermediate compatability and provides optimal security and compatability trade off, allowing older devices and browsers.
If for some reason you need to support older devices or browsers, you may use RSA and older TLS versions. Please remember, older TLS versions and weak ciphers opens your server to MITM attacks! As such this not recommended. For the highest level of security and to take advantage of QUIC, use only TLS 1.3 (Modern compatability).
Lastly, for TLS 1.2 you can include Diffie Hellman Parameters.
openssl dhparam -dsaparam -out /etc/nginx/dh/dhparam.pem 4096
¶ Kernel TLS
What is kTLS? This requires the TLS kernel module. To use requires the an up-to-date NGINX, OpenSSL 3+ and Linux kernel.
- Ubuntu 22.04, kernel support is present, OpenSSL 3 is present. Just install NGINX.
- Ubuntu 20.04, kernel support is present, OpenSSL 3 is absent. You can custom build NGINX with it compiled or install it separately and link to it. It's simpler to custom build.
- Arch, kernel support is present, OpenSSL 3 is present. Just install NGINX.
Standard builds of OpenSSL 3 will lack QUIC support.
Check to see if the module is loaded with:
lsmod | grep tls
If not loaded, check your kernel version.
uname -a
You need kernel version 5.11 or later. With an updated OS, this shouldn't be a problem. Simply load the module on boot:
[nano|gedit] /etc/modules
Add in at the bottom, tls. Save and restart.
¶ Direct IP Access
To prevent anyone from bypassing your domain by using the direct IP, you'll need an additional conf file to stop the server from serving content. See the reference files. For HTTPS, you'll need a "fake" or invalid (untrusted) TLS certificate since you're not officially supporting this access.
openssl req -x509 -nodes -newkey ec -pkeyopt ec_paramgen_curve:prime256r1 -keyout serverkey.pem -out servercert.pem -days 3650 -subj "/CN=invalid"
This doesn't stop bots and people probing the IP looking for services. Because the server is still there. It's just dropping the connection refusing to deal with it. Due to the design of the internet, it is impossible to completely stop probing and scanning. Think of it like a door that's been locked on a building. Everyone can come knock on the door, but they don't get a response and can't get in.
¶ Initial Performance
The directive ssl_buffer_size directly relates to time to first byte (TTFB). NGINX defaults to 16k if you do not set this manually. The lowest value is 1400. Jellyfin through NGINX appears to work best with 4k or 8k. You can test your server here.
¶ Summary
The remaining directives are already setup with their recommended values. The configuration nets the following end results if you obtain an TLS certificate using the recommended configuration:
- Only works in browsers with SNI support.
- Supports TLS 1.3 only.
- HTTP Strict Transport Security (HSTS) with long duration.
- Cipher Suites are strong.
- Downgrade attack prevention.
- Forward Secrecy enabled.
- OCSP stapling.
- SSL Session cache.
- ALPN (HTTP/2)
And if you elected to use a custom NGINX build, you can add:
- HTTP/3
- 0-RTT QUIC supported.
- Web Application Firewall (WAF) by ModSecurity
Here are handful of educational resources and testing sites:
- Transport Layer Security (TLS)
- Qualys SSL Server Test
- Mozilla Observatory
- Google CSP Evaluator
- HTTP/3 Check
¶ Tips
Lastly, here are some general tips:
- You shouldn't turn off
proxy_bufferingas it's beneficial. To get your page size for buffering:grep -ir pagesize /proc/1/smaps
-
If you have a purchased a domain, enable DNS CAA.
CAA is a type of DNS record that allows site owners to specify which Certificate Authorities (CAs) are allowed to issue certificates containing their domain names.
With a certificate from LetsEncrypt you can create a
CAArecord that points toletsencrypt.orgfor the root of your domain. -
Get on the HSTS preload list and use DNSSEC if provider allows.
¶ AppArmor or SELinux
SELinux and AppArmor enhances system security. Locking down Jellyfin and NGINX permissons minimises the risks of system comprimise. Denying by default and explicitly allowing access to selected resources.
Profiles are not provided. You should create these on your own. While this isn't strictly required, it is encouraged.
¶ Troubleshooting
If you have been locked out either by malicious attempts or forgot your own password, heres how you can get back in.
For ease of use, a GUI based application exists for Linux, macOS and Windows. Download DB Browser for SQLite
- Stop Jellyfin.
- Run DB Browser for SQLite
- Open the
jellyfin.dbfile by clicking [Open Database]. - Click the [Browse Data] tab.
- From the "Table" drop menu in the top left, select "Users" in list.
- Locate the "InvalidLoginAttemptCount" column.
- Zero out the row for your username.
- Locate the "Password" column.
- Right click the row for your username and click "Set to NULL"
- Click the [Execute SQL] tab.
- Paste the following in "SQL 1":
UPDATE Permissions SET Value = 0 WHERE Kind = 2 AND Permission_Permissions_Guid = ( SELECT Id FROM Users WHERE Username = 'YourNameHere' );
- Edit
YourNameHerewith your username. - Click the blue play icon to execute.
- Click [Write Changes] at the top of the window.
- Click [Close Database] at the top of the window.
If you are prompted to save any additional changes, do so. Start Jellyfin and login again with your username without a password. You should have no issue.
For recovery purposes just in case, you should create another admin user with an arbitrary username. Save it in a password manager along with your other accounts.
¶ Further reading
This section will explain why certain choices are outlined in the above guide and other points that don't necessarily fit in line with the basics of just getting up and running.
¶ Cloudflare
It is possible as of late 2023 to use Cloudflare security services. You must make sure the following settings are applied before you start use.
- Always Online™: Disabled
- Browser Cache TTL: Respect existing headers
- Cache Rules: IF
(http.host eq "jf.example.me") or (http.request.full_uri eq "https://jf.example.me/*")THEN Bypass cache.- It is very important you have this cache rule set. Otherwise Cloudflare will store video stream (.ts) chunks and the hundreds of assets in your account cache.
- If using TLS 1.3 only on your server, ensure Cloudflare is using TLS 1.3 only as well.
¶ Compression
Since 2019 all major browsers support Brotli[1][2] compression. A server using Brotli can compress as fast or faster than gzip for a better compression ratio - meaning smaller files. Changing compression method can significantly improve load times when navigating.
Jellyfin server is built with .NET Kestrel. This server works great with NGINX in front of it. The contributors have enabled compression by default using gzip. NGINX won't do anything to files if it passes through with gzip already done.
NGINX performs compression before sending responses to clients, but does not “double compress” responses that are already compressed (for example, by a proxied server).
You can use the gunzip module in NGINX to decompress the upstream from Kestrel, or remove proxy_http_version 1.1; (this breaks stuff). It's really unnecessary to have NGINX do twice the work when you can just disable compression from the source. Disabling gzip requires building Jellyfin from source since the code is compiled.
With gzip disabled in Jellyfin you can then define your own gzip compression level, or if you built NGINX with Brotli, you should use that instead.
¶ LAN TLS
This is entirely optional.
There is little reason to encrypt the local connection. It isn't exposed to the world by default. You really shouldn't expose it either. If you must, you'll want to use your Windows computer out of convenience. PowerShell running as admin:
Set-Location -Path "cert:\CurrentUser\My"
New-SelfSignedCertificate `
-Type 'SSLServerAuthentication' `
-Subject "CN=Jellyfin,O=Self,OU=Home Server" `
-KeyUsage DigitalSignature `
-KeyAlgorithm ECDSA_secP256r1 `
-NotBefore (Get-Date) `
-NotAfter (Get-Date).AddMonths(12) `
-FriendlyName "Jellyfin media server" `
-TextExtension @("2.5.29.17={text}DNS=<devicename>.local&DNS=localhost&IPAddress=192.168.1.254","2.5.29.19={text}CA=Yes")
Make sure you edit the device name and IP address in the command!
- Search Windows for "user certificates" from start/search.
- The certificate is located under [Personal] > [Certificates].
- Drag the certificate to [Trusted Root] > [Certificates].
- You'll be prompted to trust it.
- Right click and select [All tasks] > [Export...]. You have to export the private key with the certificate.
- You are required to enter a password. It doesn't have to be anything complex.
- Place the certificate on the server computer in a safe location (
/etc/nginx/jellyfin). - From the Jellyfin dashboard under Networking, enable HTTPS, enter the absolute path to the certificate and the password.
- Save and restart Jellyfin.
Visit the LAN IP using HTTPS and the 8920 port.
| Secure LAN |
|---|
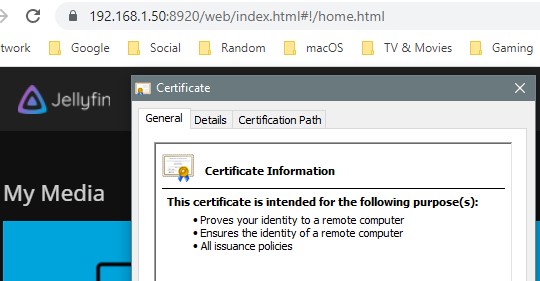 |
Again, largely useless but for educational reasons, with this set up you can secure the entire connection from backend to edge. Extract the key and certificate from the PKCS#12 file:
openssl pkcs12 -info -in /etc/nginx/jellyfin/jellyfin.pfx -password pass:<password> -nodes -nokeys -out /etc/nginx/jellyfin/cert.pem
openssl pkcs12 -info -in /etc/nginx/jellyfin/jellyfin.pfx -password pass:<password> -nodes -nocerts -out /etc/nginx/jellyfin/private.key
Edit the vhost file and uncomment under the location / block:
proxy_ssl_certificate /etc/nginx/jellyfin/cert.pem;
proxy_ssl_certificate_key /etc/nginx/jellyfin/private.key;
proxy_ssl_protocols TLSv1.2 TLSv1.3;
proxy_ssl_session_reuse on;
Swap the upstream port from 8096 to 8920 and use HTTPS here proxy_pass https://jellyfin;
The cert.pem file can be downloaded to an iOS or Android device and manually trusted.
¶ Internal DNS
In a default network configuration, when you navigate to your Jellyfin URL (jf.yourdomain.me) it gets resolved like every other website on the internet. This means the connection goes out and back in. There isn't a need to use your domain while on your home network. You should use the private IP address and port number. If you have a data capped internet plan, this counts against you. If you do want to use your domain, you need to resolve it internally. There are muliple solutions to this.
- The absolute simplest method is modifying the
hostsper device. This is very easy with computers. For mobile and IoT devices like Chromecast, this is out of the quetsion for most users. - Use PiHole or AdGuard Home software. It can be installed on a Raspberry Pi board, or on the same computer in a docker container or natively. The Local DNS setting allows you to set the LAN IP for the Jellyfin URL. Keep in mind, certain devices are hard coded to use their own DNS servers. Which means these softwares will be completely bypassed. The Chromecast is one such device. In this case, you'll need to intercept or block it. Some users report entirely blocking Google DNS with a static route causes Google devices to cease functioning. In which case redirecting is the solution.
- If you're lucky and have a router that offers more advanced features out of the box (or has custom firmware options), you can set a DNS redirect with
iptables. - Those of you with custom routers utilising pfsense have it easy.