¶ What is "headless?"
In computer terms this means without a display. Many servers are in fact headless and thus are managed entirely over command line or remote desktop from a main computer. On some occasions displays will be connected to reinstall an OS or perform updates or changes to firmware.
Install the required software:
apt install ssh samba smartmontools xserver-xorg-video-dummy cockpit needrestart -y; snap install htop
¶ SSH
This is for command line and file manager use.
You do not need root for the first step of setting up SSH. If you are currently root, you can type exit to revert to your standard user account. You need to generate private key to use for this account:
ssh-keygen -t ecdsa -b 256
ssh-keygen -t ed25519
When prompted for a path, press ENTER to continue using the default path.
When prompted for a password to encrypt the private key, press ENTER twice to skip.
Elevate to root again to edit the SSH config:
nano /etc/ssh/sshd_config
Then uncomment the following lines by removing the #:
PasswordAuthentication yes
PermitEmptyPasswords no
CTRL + S to save the configuration. Then restart the sshd service:
systemctl restart sshd
At the location /home/<yourname>/.ssh, duplicate id_ecdsa.pub and rename it to authorized_keys.
Copy id_ecdsa.pub and id_ecdsa to your Windows computer at the location C:\Users\<yourname>\.ssh.
Then delete id_ecdsa.pub and id_ecdsa off the Ubuntu server.
On your Windows computer, create a file named config (no extension) in the .ssh folder. You need to have something like this inside that file:
Host <linuxIP>
  HostName <linuxIP>
  IdentityFile C:\Users\<yourname>\.ssh\id_ecdsa
  User <linuxUserName>
Verify OpenSSH Client is installed on Windows.
- Windows 11: Settings > Apps > Optional features > Installed features
- Windows 10: Settings > Apps > Apps & features > Optional features
Open Terminal or PowerShell on the Windows computer and type in:
ssh linuxUserName@linuxIP
You should be connected to the server via SSH. This allows for entirely managing the server without having a display attatched or physically using it.
¶ Cockpit
¶ SAMBA (SMB)
Used for file shares.
This software is ready to go for the most part as soon as it installed. You only have to make one change.
nano /etc/samba/smb.conf
Look for:
# Setup usershare options to enable non-root users to share folders
# with the net usershare command.
usershare owner only = false
and change the value to true. If you do not see this line, you can add it. CTRL + S to save the configuration. Then restart Samba.
systemctl restart smbd
Now you can share folders.
- Open the file manager and locate your desired folders.
- Right click on them and click [Properties].
- Then click the [Local Network Share] tab.
- Tick all three boxes in this window.
- Click [Create share].
- On your Windows computer, open Explorer and click This PC.
- From the ribbon at the top, click [Map network drive].
- Choose any Drive letter you like that is not in use.
- In the folder path, enter the name of the Ubuntu sever and the name of the shared folder in the format
\\MyServer\FolderName. - Tick the two boxes below and click [Finish]
- When asked for your username and password, enter your Ubuntu username and password.
You can now easily copy files to your server.
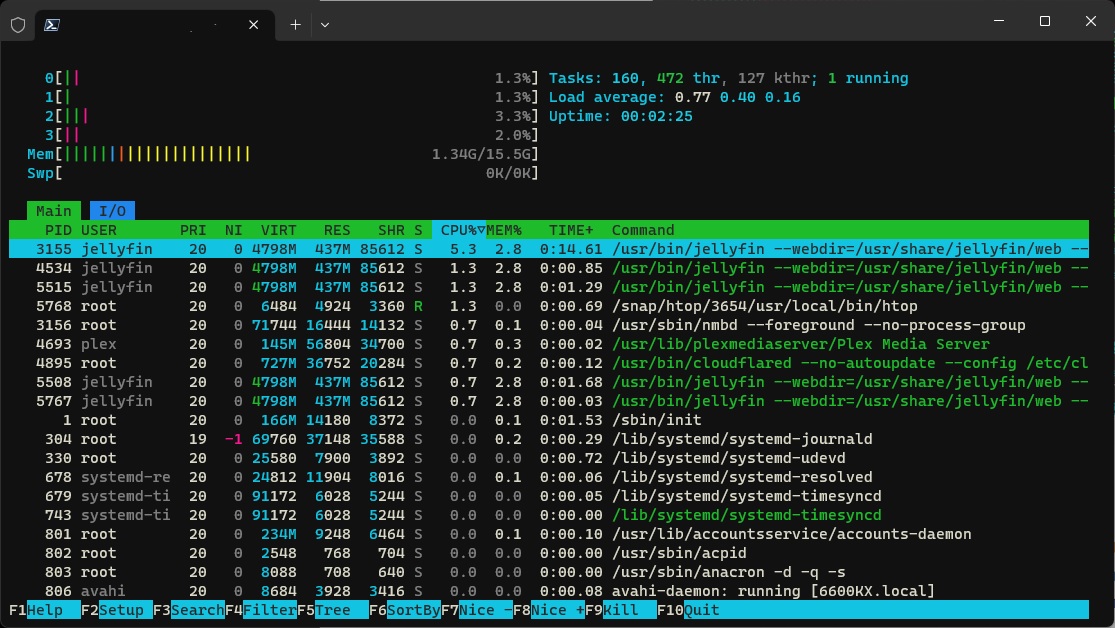
¶ htop
Real time performance monitor / task manager over SSH.
htop
¶ Smart Tools
This is essential to managing disk health. WD Red drives are long lasting for 24/7 runtime. You should be using these types of drives for a media server / NAS environment. With these tools installed you should setup weekly (or monthly) cron job to asses drive health. Example commands:
smartctl -t short /dev/sda
smartctl -t short /dev/sdb
smartctl -t short /dev/sdc
smartctl -l selftest /dev/sda
smartctl -l selftest /dev/sdb
smartctl -l selftest /dev/sdc
Once a drive reaches 40,000 to 70,000 hours (4+ years), they typically start to have failures of some kind.
¶ Torrents
Manage your torrents from any device, even remotely.
Download qBittorrent with no Xorg (qt) and install:
add-apt-repository ppa:qbittorrent-team/qbittorrent-stable; apt update; apt install qbittorrent-nox -y
Add a dedicated user and assign your user to the group:
useradd torrents -m -u 947 --system --shell /usr/bin/nologin
adduser your-username qbittorrent-nox
Create a startup service:
nano /etc/systemd/system/qbittorrent-nox.service
Paste in:
[Unit]
Description=qBittorrent Web Client
After=network.target

[Service]
#Do not change to "simple"
Type=forking
User=qbittorrent-nox
Group=qbittorrent-nox
UMask=007
ExecStart=/usr/bin/qbittorrent-nox -d --webui-port=8180
Restart=on-failure

[Install]
WantedBy=multi-user.target
Load and start:
systemctl daemon-reload; systemctl enable qbittorrent-nox; systemctl start qbittorrent-nox
To access the torrent client, on any device, open the web browser and navigate to http://LANIP:8180. The default login:
- Username:
admin - Password:
adminadmin
To access remotely over the internet, you need to use a reverse proxy. NGINX is recommended. Otherwise it's local only. You can use a great app called Transdroid to add torrents from an Android phone or tablet. iOS users have to use Safari.
Below are some settings suggestions once installed and running. To change these, click [Tools] > [Options]
¶ Authentication
- Change your login username and password. Click [Save] at the bottom.
- Network interface should use the use the adapter created by your VPN. Click [Save] at the bottom.
You should already have a VPN of your choice installed. If you do not, get one now. If the VPN is down, torrents have no connection. With your VPN installed, you need to configure the split tunnel or exclusions. Everything needs to bypass the VPN. This is intended. A VPN creates its own adpater. This is commonly named tun0 or vpn0.

Setting qBitorrent to use this adapter routes all torrent traffic through it. Here is an example of Private Internet Access:
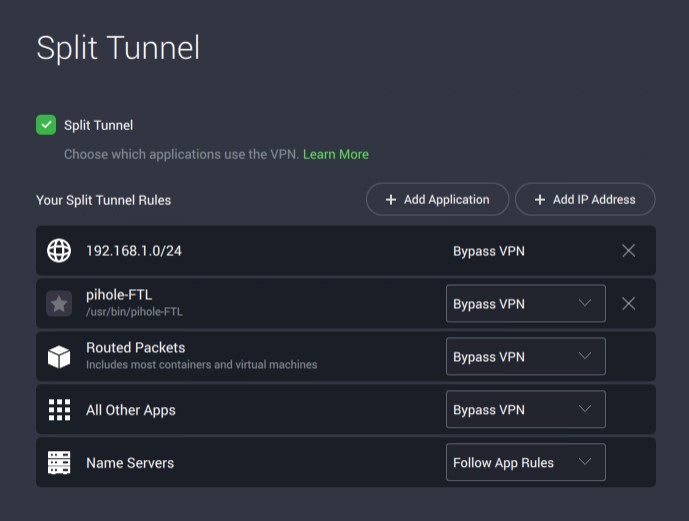
With this configured, you need to verify it works as expected.
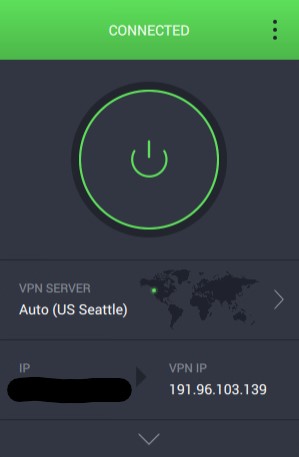
Go to https://torguard.net/checkmytorrentipaddress.php and copy the unique magnet link. Add the magnet link in qBitorrent and start the "download". Wait a bit and the site should tell you what IP it sees. If you see the IP as the VPN, you're good! If you see your real IP, that's bad and something has failed with the VPN.

¶ Need Restart
This utility can check whether or not a service needs to be restarted after applying updates to the system. By default it runs automatically in interactive mode after every apt upgrade then presents a terminal UI. For simpler output, you can change the default behavior.
nano /etc/needrestart/needrestart.conf
Look for the following:
# Restart mode: (l)ist only, (i)nteractive or (a)utomatically.
#
# ATTENTION: If needrestart is configured to run in interactive mode but is run
# non-interactive (i.e. unattended-upgrades) it will fallback to list only mode.
#
#$nrconf{restart} = 'i';
You need to uncomment, remove #, from the the line $nrconf{restart} = 'i';. Then replace i with l.
Press CTRL + S to save, then CTRL + X to close. Again, it runs automatically after every apt upgrade but now it will simply print out a list of services that need to be restarted at the end.
¶ Xorg Video Dummy
This is for remote desktop use once your monitor is disconnected. DO NOT attempt this step while using the computer with a connected monitor.
Create config:
nano /usr/share/X11/xorg.conf.d/xorg.conf
Then paste the following contents:
Section "Device"
    Identifier  "Configured Video Device"
    Driver      "dummy"
EndSection

Section "Monitor"
    Identifier  "Configured Monitor"
    HorizSync 31.5-48.5
    VertRefresh 50-70
EndSection

Section "Screen"
    Identifier  "Default Screen"
    Monitor     "Configured Monitor"
    Device      "Configured Video Device"
    DefaultDepth 24
    SubSection "Display"
    Depth 24
    Modes "1366x768"
    EndSubSection
EndSection
Restart system.
Once restarted, connected monitors will no longer work. This is intended. The dummy service now provides a fake display that allows remote desktop to work without a monitor physically connected. Check if Xorg is running ps -e | grep X or use htop and look for the gdm tree.
Download and install Teamviewer Host:
dpkg -i teamviewer-host.deb
# Setup will fail if you have two factor sign-in. If asked to login, you can let it fail.
teamviewer setup
# Info will allow you to see your computer ID
teamviewer info
teamviewer passwd <yourpassword>
Then connect from the Teamviewer app on your Windows computer. For many users, this makes managing the system a little more friendly as now you can remotely login and have a display. Having a UI for some things helps and not everything you use will have option to use command line. And some things just work better when you use a UI.